
WordPress AFS Analytics Plugin

AFS Analytics plugin
AFS Analytics provides a WordPress plugin with an embedded dashboard .
You can install it from your WordPress dashboard or download the latest plugin version.
Video: Install AFS Analytics Plugin
Install plugin
1. To start the installation your need login to your WordPress admin website.
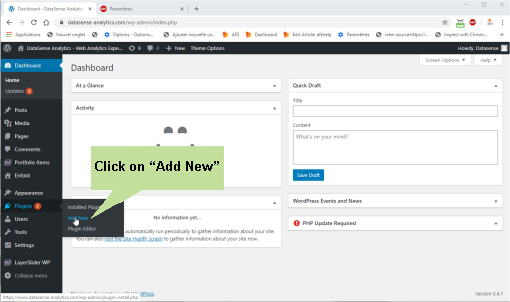
2. Head over to "Plugins" on the left sidebar ( main menu) in your dashboard and select "Add new".
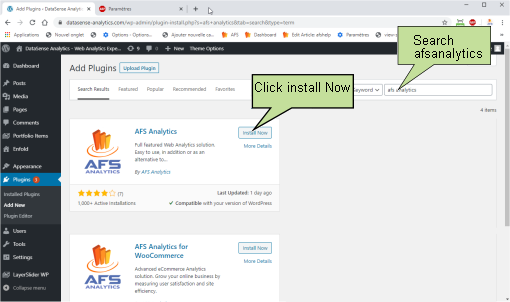
3. After a query the search box appears. Type "afsanalytics" into the search field and press the "return" key to submit. This should bring up some results. Select the AFS analytics plugin and click on the "install now" button.
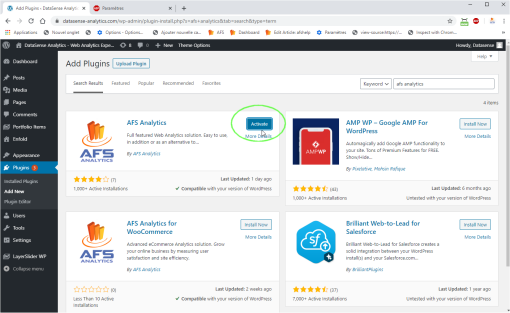
4. Click on "Activate plugin".
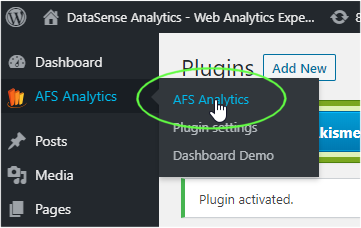
5. After activating the plugin, select 'AFS Analytics' on main WordPress menu.
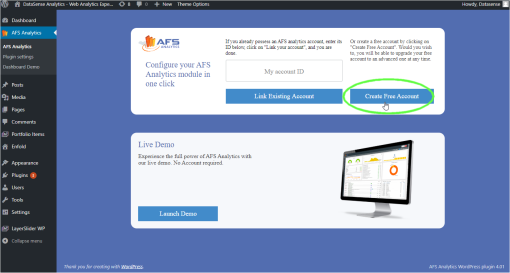
6.
If you already have website ID (8 digits), you just have to enter your website ID in the field 'website ID' and click the button "link existing website". This option is also available in the plugin settings. That's all you need to do.
Otherwise:
On the registration screen, Click the 'Create free account' button.
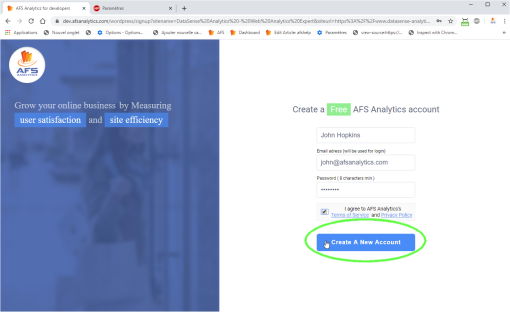
7. And just fill out your details.
The plugin is now installed and activated.

To view your website analytics select the option "AFS Analytics" on the WordPress admin panel menu or go to afsanalytics.com website.
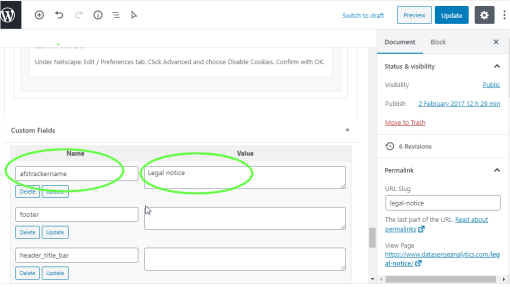
How to customize the AFS tracker name
By default, AFS Analytics uses the text inserted between the "TITLE" tags as the tracker/page name. However with the AFS Analytics plugin, you can define your own tracker/page title for each post. To do this, type the title you want into the "AFS Analytics tracker name" field.
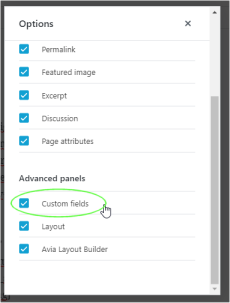
1. Edit the post and click on the option button .

By AFS Analytics, Thursday, August 20, 2020